Setup and fly
The goal: sit in the seat, put on the headset (or switch on the screens), launch the sim, and fly. Everything below is done once. The daily routine at the end is a double click and about 60 seconds.
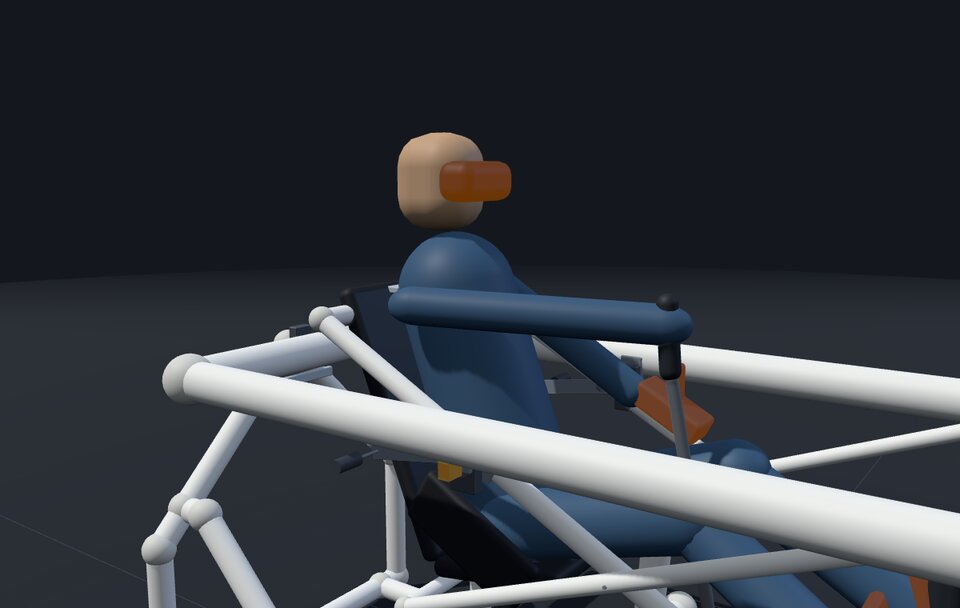
A headset moves with your head and blocks out the room, so when the cockpit tilts the whole world agrees with your inner ear. You can look over your shoulder into a turn. It weighs about a pound, so the cockpit balance doesn't change.
Software: Meta Horizon Link (PC app), OpenXR Motion Compensation, your sim. Daily: double click fly-vr.cmd, put on the headset, fly.
Good for sharing the experience with people watching, and for long sessions without a headset. The screens stand on their own frame just past the nose and do not move, so the cockpit tilts and the picture doesn't. It still works well with a head tracker, but it is less convincing than VR.
Software: NVIDIA Surround or AMD Eyefinity (or X-Plane's own multi monitor setup), TrackIR, your sim. Daily: switch on the screens, double click fly-monitors.cmd, fly.
What to buy
The frame, bearings, electronics, throttle, and pedals are on Parts & build. These are the extras for each display path and the software. The same lines, with ordered checkboxes, are also on the Parts page.
Pick one sim to start. MSFS 2024 is the best all round choice. X-Plane 12 handles three monitors best. DCS is for combat jets.
1. PC prep (once)
- Windows 11, fully updated.
- Latest graphics driver from the NVIDIA app (or AMD Software: Adrenalin). Install the full package; Surround and Eyefinity live there.
- Install Steam and your sim. MSFS 2024 streams scenery, so give it a fast NVMe drive with at least 150 GB free.
- Plug the TWCS throttle into USB and the TFRP pedals into the throttle's RJ12 port. Windows installs them automatically. Thrustmaster's driver package adds a test panel, which is optional.
- Run the cable from the rig's powered USB hub to a USB 3 port on the back of the PC. Front panel ports often drop out under load.
- Power plan: set Windows to Best performance and turn off USB selective suspend (Control Panel, Power Options, Change plan settings, Advanced). This stops the stick and pedals disconnecting mid flight.
2. Flash the firmware (once, about 20 minutes)
The firmware makes the Pro Micro tell Windows "I am a joystick" and report the cockpit's angles as stick position. Do this on the bench before the sensors go on the rig, so you can test by turning the magnets by hand.
- Install Arduino IDE 2.
- Get the joystick library: open ArduinoJoystickLibrary, click Code, then Download ZIP, and unzip it. Copy the inner
Joystickfolder intoDocuments\Arduino\libraries\, then restart the IDE. (Sketch, Include Library, Add .ZIP Library can fail with this repo because the library sits in a subfolder.) - Download
fsd_hid.inoand put it in a folder namedfsd_hid. The IDE insists the folder and file names match. Open it. - Plug the Pro Micro in with a data capable USB-C cable. Tools, Board, Arduino AVR Boards, Arduino Leonardo. Tools, Port: pick the COM port that says Arduino Leonardo.
- Click Upload (the right arrow). "Done uploading" means it worked.
- If the upload hangs or the port vanishes (common with clones): click Upload, and the moment the status says "Uploading...", short the board's RST pin to GND twice quickly with a jumper wire. That opens the bootloader for 8 seconds and the upload goes through.
- Bench test: wire both AS5600 boards (OUT to A0 and A1, VCC, GND, DIR to GND) and one button to pin 2. Press Win+R, run
joy.cpl, select Arduino Leonardo, then Properties. Turning a magnet over its sensor should sweep the X or Y crosshair, and the button should light button 1.
ROLL_RANGE_DEG | Degrees from center to the side stop that equals full stick. Lower it for more sensitive roll. |
PITCH_UP_DEG / PITCH_DOWN_DEG | The same for pitch, to the padded up and down stops. |
DEADBAND_DEG | Small center zone so the plane doesn't wander when you sit still. |
INVERT_ROLL / INVERT_PITCH | Flip if an axis moves the wrong way. |
3. Calibrate and bind (once)
- Sit in and balance the cockpit at level (step "Balance" on the Parts page).
- Hold trigger + button 4 for 3 seconds. The center is saved on the board.
- In
joy.cpl, tilting right moves the crosshair right, and nose down moves it up. If not, flip the invert setting and reflash. - Rock stop to stop. Each axis should reach nearly full travel. If it falls short, lower the range settings.
MSFS 2024: Options, Controls, select Arduino Leonardo, create a new profile. Under Flight Control Surfaces, bind Aileron Axis to the X axis and Elevator Axis to the Y axis. In Sensitivity, set both linear with 0 dead zone. Give the TWCS its own profile (throttle and rudder axes), and unbind any other joystick.
X-Plane 12: Settings, Joystick, rock the cockpit, assign the moving axes to Roll and Pitch, and run Calibrate. Keep the response curve linear.
DCS: Options, Controls, select the aircraft, Axis Assign, bind Pitch and Roll to the Leonardo's Y and X. In Axis Tune, set curvature and dead zone to 0. Clear the default bindings on other devices.
4. Path A: Quest 3 (once)
- Set up the headset with the Meta Horizon app on your phone and update it.
- On the PC, install the Meta Horizon Link app (from meta.com, "Set up Link"). Sign in with the same Meta account.
- In the Link app, open Settings, General, and set OpenXR Runtime to Meta Horizon Link. Every sim then uses the headset through OpenXR.
- Connect the Link cable to a USB 3 port. In the headset, accept Enable Link. Check "always allow" so it connects automatically next time.
- In the Quest settings, set Guardian (boundary) to stationary and draw it around the seat. Otherwise it complains every time the cockpit tilts.
- Install OpenXR Motion Compensation. Strap the left Touch controller firmly to the cockpit frame behind the seat back, with no wobble, using velcro or a 3D printed clip. In OXRMC, choose the left controller as the tracker, and bind activate and recenter to two grip buttons. You fly with the stick and throttle, so you won't miss the controller.
- Sim VR settings:
- MSFS 2024: General Options, VR mode. Start with the VR "medium" graphics preset. Press Ctrl+Tab in flight to toggle VR.
- X-Plane 12: Settings, VR Hardware, enable VR.
- DCS: the launcher in
fly-vr.cmdstarts it in VR with OpenXR.
- Optional, no cable: buy Virtual Desktop, install its free streamer on the PC, and wire the PC to a Wi-Fi 6 or 6E router in the same room. It is smoother than Air Link for flight sims.
The headset tracks your head against the room. When the cockpit tilts, the headset reads that as you tilting your head inside the virtual cockpit, so the virtual cockpit swings around you. That breaks the illusion and can make you queasy.
OXRMC watches the controller strapped to the cockpit and subtracts the cockpit's motion. The virtual cockpit then stays bolted to your seat while you, the seat, and the cockpit tilt together. This applies to both the classic and the powered build.
5. Path B: triple monitors (once)
- Placement. Roll the triple stand to just past the nose of the rig, with about 2 inches of clearance at full nose down. Set the center screen's middle at your seated eye height, about 50 inches off the floor. Angle the side screens in about 45 to 60 degrees so they wrap your view. Your eyes will be about 5 feet away, which is why the list uses 32" screens.
- Plug all three monitors into the graphics card with DisplayPort, never the motherboard. Set each to its full refresh rate in Windows Display settings.
- Surround (NVIDIA app, or NVIDIA Control Panel, Configure Surround) or Eyefinity (AMD Adrenalin, Display). This joins the three screens into one 7680 x 1440 display. Set bezel correction so lines run straight across the gaps.
- Sim settings:
- MSFS 2024: run full screen on the Surround display and raise the field of view. MSFS draws triples as one wide flat image, so the side screens look a little stretched; a smaller side angle (about 45 degrees) reduces it.
- X-Plane 12: best for triples. Skip Surround. In Settings, Graphics, Monitor Configuration, give each monitor its own full screen window and set each window's lateral field of view offset (left, center, right). Each screen then gets the correct perspective.
- DCS: run on the Surround display. In Options, System, choose a three screen monitor setup and match the resolution to the combined width.
- Head tracking. Mount the TrackIR camera on top of the center screen and clip the TrackClip to a cap or headset. In the TrackIR software, load a smooth profile and bind center and pause to grip buttons. Note: when the cockpit tilts, your head moves too, and the tracker will pan the view a little. Many pilots like this. If you don't, lower the roll and side to side curves in the TrackIR profile.
- Expect this: the screens don't tilt with you, so in a hard bank the horizon on screen and your body briefly disagree. That is the trade for having no headset. VR has no such mismatch.
Three 1440p screens are 11 million pixels, about a third more than a 4K screen. For MSFS 2024 at a smooth frame rate, plan on an RTX 5080 class card (see A better sim PC). On a weaker card, use DLSS or FSR and medium settings.
A cheaper single screen option is one 55" to 65" TV on the same stand. It is less immersive, and it works with every sim with no setup.
6. Every day: sit down and fly
- Turn on the PC.
- Double click
fly-vr.cmdon the desktop. It opens the Link app and then your sim. - Sit down, level the cockpit, and put on the headset. Link connects on its own.
- Press your OXRMC recenter button, then the sim's VR recenter.
- Fly.
- Turn on the PC and the three screens.
- Double click
fly-monitors.cmd. It starts head tracking and then your sim. - Sit down, level the cockpit, and press your TrackIR center button.
- Fly.
Open the .cmd file in Notepad once and set SIM to msfs2024, xplane12, or dcs. Fix the app path if yours is installed somewhere else. The Pro Micro, throttle, and pedals need nothing at startup; they show up as soon as the PC is on. Windows may warn the first time you run a downloaded .cmd file; choose More info, then Run anyway.
How it works: does the sim follow the stick?
The cockpit is the joystick. Push the grip forward and the cockpit noses down, the sensor reads it, and the sim pitches the plane down. The sim never moves the device.
Remember: the cockpit's tilt is your control input, not the plane's attitude. Hold a right tilt and the plane keeps rolling; center the cockpit and the plane holds its bank while you sit level, just like a real stick.
You fly with a normal USB stick on the cockpit. The sim's motion data drives the motors, so the cockpit leans with the plane.
A 2 axis rig can't hold a 60 degree bank, so FlyPT Mover gives you the start of each movement and eases back to center too slowly for your inner ear to notice.
Powered add-on setup
- Build and test the motors with nobody aboard first (Parts & build, step G). In SMC3 Utils, set PWM and travel limits short of the padded stops.
- Install FlyPT Mover, only from its official site.
- Source: add your sim. MSFS uses SimConnect, X-Plane its UDP data output, and DCS an export script that Mover installs.
- Pose: map roll to bank plus a little roll rate, and pitch to pitch plus surge. Add washout so sustained values ease back to level.
- Output: 2 axes to SMC3 on the Uno's COM port, at the baud rate set in the SMC3 sketch. Start at about 30% gain.
- Bind the cockpit's USB stick in the sim. In VR, OXRMC can use Mover's virtual tracker instead of the strapped controller.
- Add Mover to the launcher, start it before climbing in, and keep the E-stop in reach.
A better sim PC
Flight sims are limited by the CPU first and the graphics card second, and VR or triple monitors roughly double the graphics load. If you are buying or building a PC for this, here is where the money matters, from most to least.
| Part | Good (single screen or Quest 3, medium settings) | Better (Quest 3 high, or triple 1440p) | Why it matters |
|---|---|---|---|
| CPU | AMD Ryzen 7 7800X3D | AMD Ryzen 7 9800X3D | The big X3D cache is the single biggest frame rate gain in MSFS and DCS, which are CPU and memory bound in busy scenery and airports. |
| Graphics | RTX 5070 Ti, 16 GB | RTX 5080 16 GB, or RTX 5090 for the highest VR settings | VR renders two eyes at high resolution; 16 GB of VRAM is the floor. NVIDIA's DLSS is well supported in all three sims. |
| Memory | 32 GB DDR5-6000 | 64 GB DDR5-6000 CL30 | MSFS 2024 with add-on scenery and DCS with big maps both pass 32 GB. |
| Storage | 2 TB NVMe Gen4 | 2 TB NVMe for the OS and sim, plus 2 TB for add-ons | MSFS streams scenery and DCS installs run past 300 GB. Fast drives shorten load times and stutter. |
| Power and cooling | 850 W Gold | 1000 W Gold, airflow case | Long sessions at full load; quiet cooling matters when you are sitting next to it. |
| Connections | Rear USB 3 ports for the Link cable and the rig's hub. For wireless VR, wire the PC by Ethernet to a Wi-Fi 6E router in the sim room. | Most "my stick disconnected" problems come from front panel ports or unpowered hubs. | |
These are November 2026 parts. Check current reviews for MSFS 2024 VR benchmarks before buying; the CPU recommendation is the one least likely to change.
Making the rig better
Troubleshooting
| Symptom | Fix |
|---|---|
| Plane drifts with the cockpit level | Recenter (trigger + button 4 for 3 seconds) with the pilot aboard, or raise DEADBAND_DEG slightly. |
| Axis jumps or reads full deflection | The magnet is off center or too far from the AS5600 (keep a 1 to 2 mm gap). Check the axle didn't slip in the bearing set screws. |
| Stick or pedals disconnect mid flight | Move them to a rear USB port through the powered hub, and disable USB selective suspend. |
| Virtual cockpit swims in VR | OXRMC isn't active or the reference controller moved. Re-strap it tightly and press recenter. |
| Guardian keeps popping up | Use a stationary boundary, or a larger roomscale boundary drawn around the whole rig. |
| Side screens look stretched | Reduce the side screen angle, raise the in-sim field of view, or use X-Plane's per monitor setup. |
| Sim ignores the device | Check that it shows in joy.cpl, then confirm the sim profile is bound to the Arduino Leonardo device and not an old joystick. |